Setting up your board(s)
This area is reserved for those who have the overall responsibility for setting up the progress boards for the company.
These setting are under ‘Preferences – General – Progress Boards’
You will need to give yourself or a member of the team access to this preference. See Adding New Features for the Team
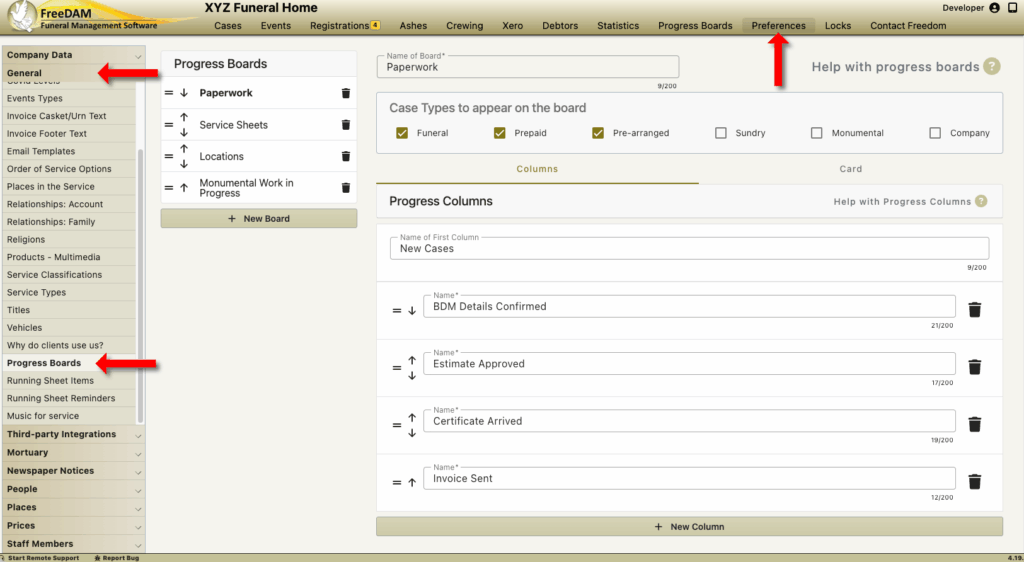
The software comes without any boards set up.
You are able to have as many boards are you require.
Each board needs to have a name. This should be something meaningful as this will be the title of the board that the team will use.
Creating a Progress Board
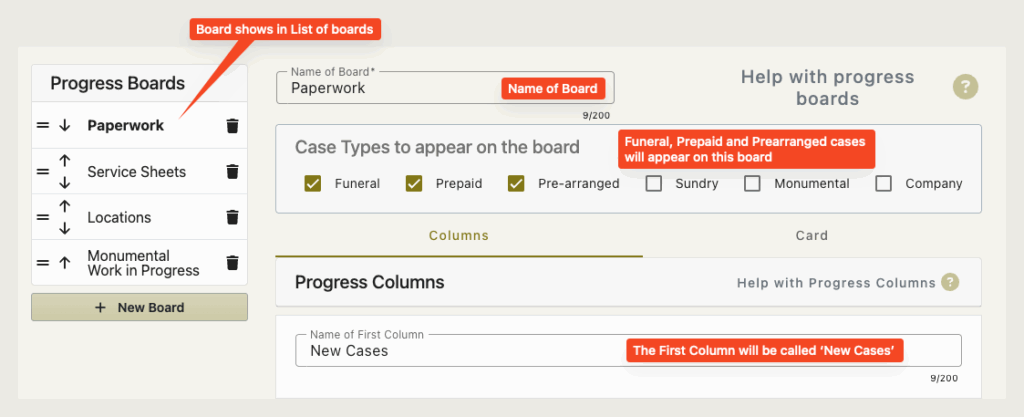
Enter a name for the board in the top field.
Select the type of cases that will appear on the board.
In most cases this will be ‘Funeral’ but you options are…
- Funeral – your normal funeral cases
- Prepaid – any prepaid cases entered
- Prearranged – any prearranged cases entered
- Sundry – any sundry case entered
- Monumental – any monumental case entered
- Company – any company case entered.
This allows you to have a board that is just for your pre-need workflows or just for your monumental work underway.
All new boards have an initial column.
This column is where new cases entered into FreeDAM will appear and generally would be a ‘holding’ column until the case’s status changes.
You are able to name this column – a good name would be ‘New Cases’.
Click Save.
You now have a progress board with a name and one column.
This progress board will display in a list of your boards on the left hand side of the screen.