Accepting Data into FreeDAM
When the family enter data, this data will start showing in the Family Portal section of FreeDAM in lists.
The family entered data will be in the right hand ‘Data entered by Family’ column and will be coloured red.
You can see in the following image that the family have entered ‘Thomas’ as the middle name of the deceased and ‘Programmer’ as the occupation.
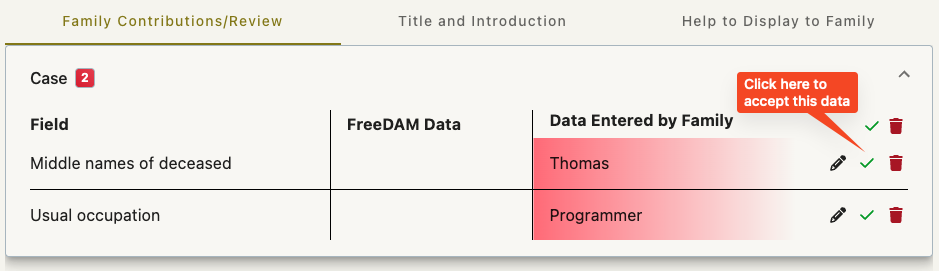
You are able to accept this data into FreeDAM by clicking the green ‘tick’ in the red column.
This will put the data into FreeDAM proper and when both fields match.
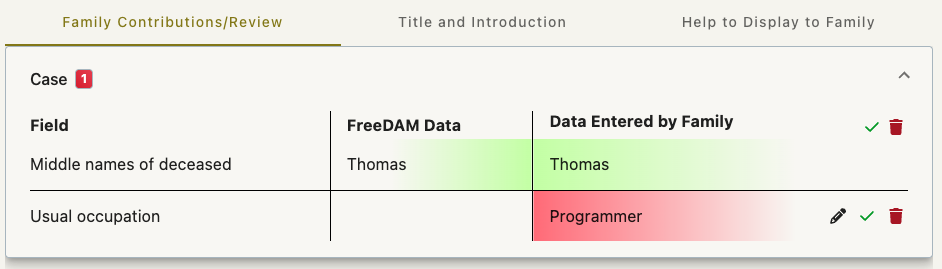
Accepted Data displays in the correct place in FreeDAM
When you accept the data on this screen the accepted data will be saved in FreeDAM as if you entered it yourself in the normal way.
i.e accepted parents data will show in the BDM section.
Accepting all the data in a section
There may be a lot of data flowing into FreeDAM for each section.
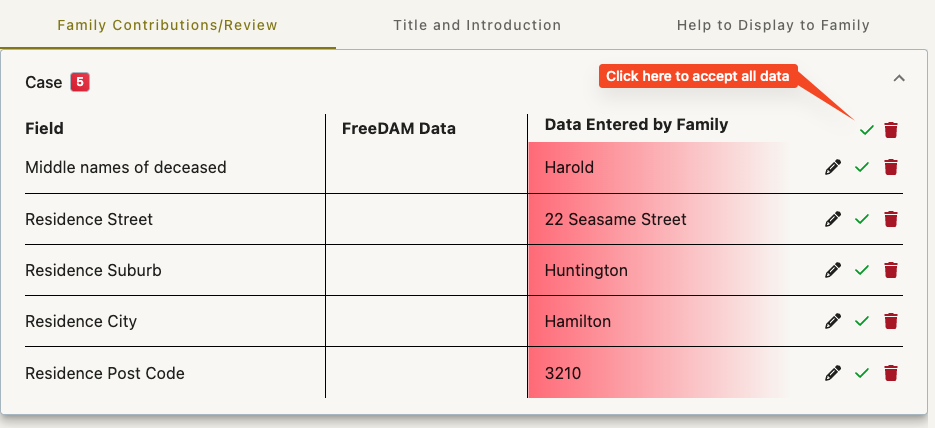
(i.e an address will have street, suburb, city, postcode and country)
If all the data in a section is correct – you are able to bring all of this data into FreeDAM at once.
Click the green ‘tick’ at the top of the section.
Rejecting Entered Data
There may be situations where you wish to reject data that has been entered by the family. (someone putting nonsense in)
In this case you are able to click the trash can in the row for individual data fields or the trash can at the top of the column to reject the whole sections data.
What do the family see when data is accepted or rejected?
The Family will always see their data that they entered.
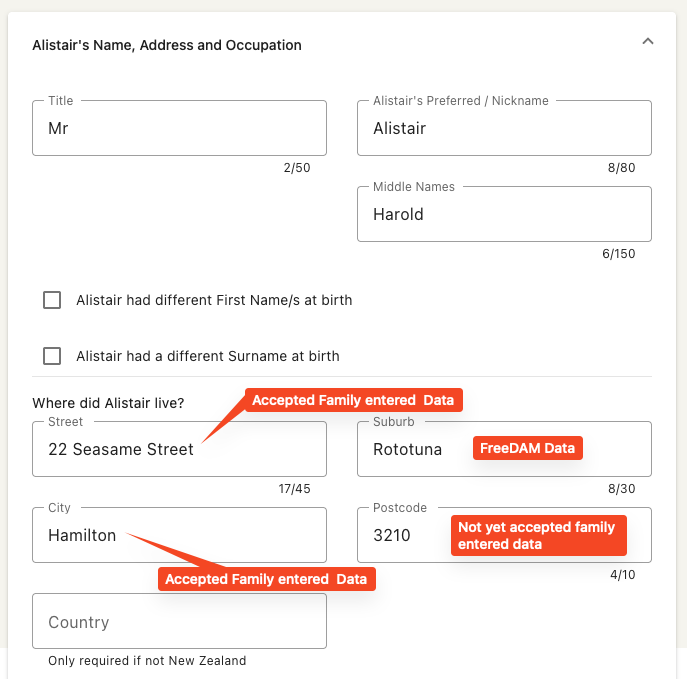
In the following case – the family entered Huntington as the suburb – but in the real data of FreeDAM we have entered Rototuna. The family will see Huntington.
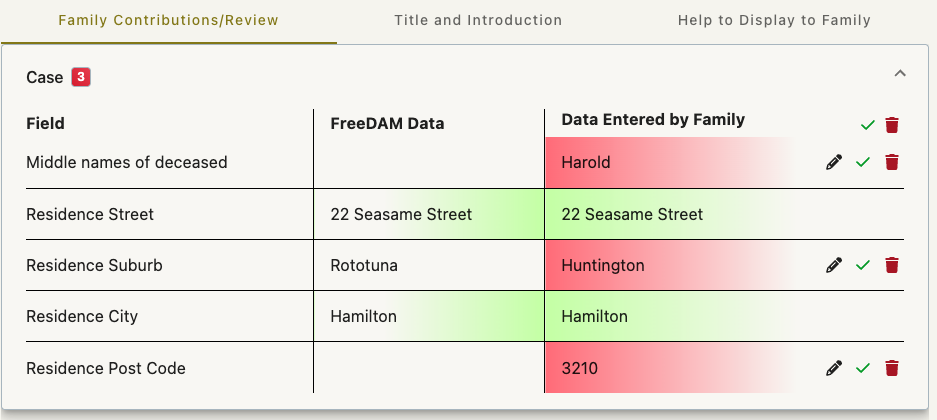
If we now reject the family’s entry of Huntington so that the suburb field for the family data is empty. then the family will see Rototuna.
Following image has had the suburb rejected. So it no longer shows as a contribution.
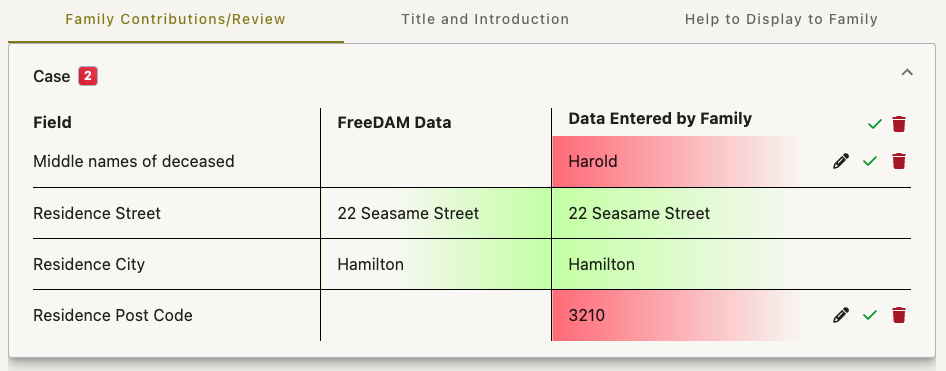
However the family view will see Rototuna.